
Before you do any sewing, some preliminary steps.
- Interface all the band pieces. I didn't do this on my first test dress, and found it really needs it.
- Mark all the dots on the pattern pieces. Matching the dots on the band and dress insures that the band pieces lay smoothly and the curves fit together properly.
- Stay stitch all the edges of the band pieces and the dress pieces. Since we are going to clip the curve, this is necessary, plus it keeps the band pieces from losing their shape.
Step 1: Clip the curve on the band piece (the convex curve).
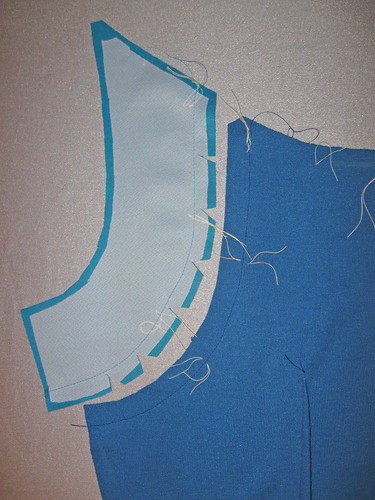
Step 2: Pin the band to the dress piece, matching the dots. Stitch the seam.

Step 3: Trim and clip the seam, press seam allowance toward the band. Now it's starting to take shape.
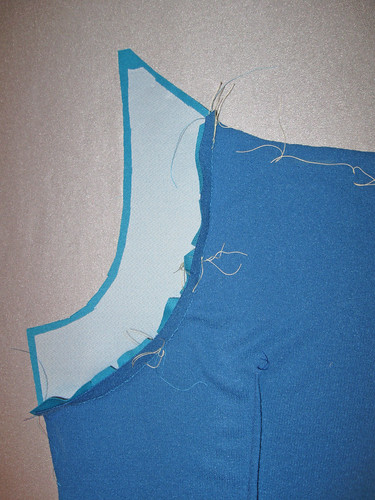
Step 4: Similar method for the upper band. Clip the band (convex curve). Here it is shown on the fabric right side, so you can see how the dots match up (marked with tailor's tacks, yellow thread)

Step 5: Same as Steps 2 and 3 above, pin and stitch seam, then clip and press toward band.

To finish, use the same process for the front of the dress, doing the side bands first and then the neck band. Of course if you have designed a different color block it may be different. Another color block look that I like is horizontal bands of color and that is a little easier to work with. To do that, divide your pattern into separate pieces, add seam allowances and sew together.
And now we come to a slightly less fun part of this project, the zipper. For any zipper that bisects pattern pieces you want the lines to match up, but it is so much more noticeable with the color block layout. I was pretty happy with the result, although I didn't get it on the first try. My method for this type of zipper is to just sew the top 5 inches or so on each side of the zipper, get that intersection point just right, and then proceed with sewing in the rest of the zipper. No need to rip out the whole thing if it is not right. Definitely another reason I don't use an invisible zipper foot. To see how I do the invisible zipper with a regular zipper foot, check out this post.

Normally on a dress like this I would apply the facings (which are matching bands with no interfacing) however I wanted to put the zipper in right then. Once the zipper is in then you can't pull through the shoulder seams. Here is a look at the facing. I used the regular facing for the dress.

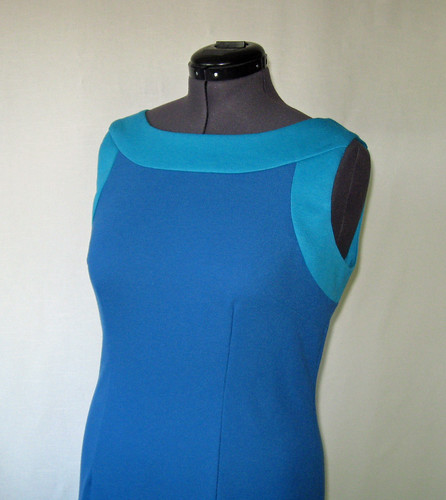
So here is the finished dress, side view and front view. That is another spot where the seam has to match, under the arm where the bands meet again. For a simple dress there are lot of little details to consider!

Anyone interested in trying to adapt their TNT pattern with this style of color-blocking?
It's a great way to get more mileage out of a great fitting pattern with a whole new look.
Here is today's garden photo, not really matching but a very nice spring color, gladioli in front of the pink jasmine.


Your dress is so perfect and your sewing is so precise. I love the simplicity of the dress but the colour blocking lifts it and makes it alot more interesting.
ReplyDeleteThank you for this tute. I do like the precision of your work as well. It's something I should aim to do more often because the dress is so much more impressive.
ReplyDeleteCongratulations on RTW contest 2nd prize.
ReplyDeleteThis tutorial is what I've been looking for~ Thank you!
ReplyDelete